
The new V 1.4 MIKI-D firmware allows you to use a stereo input also. As the MIKI-D only has a 3-pin XLR input, which usually connects to a balanced mono signal, you may need to use an adapter for stereo inputs.
So normally the wiring is for balanced mono inputs:
- Pin 1: GND
- Pin 2: +
- Pin 3: –
But for stereo, the MIKI-D expects the following wiring:
- Pin 1: GND
- Pin 2: Left
- Pin 3: Right
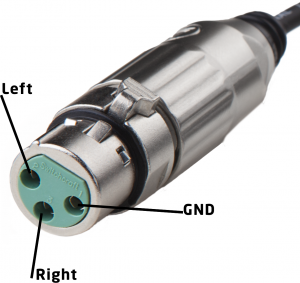
Here are some examples to connect stereo devices to the input:
- Use a 6.3 mm Stereo Jack to XLR Male converter like this to connect the MIKI-D to any 6.3 mm unbalanced stereo output or headphone output.
- The Audio-Technica AT2022 Stereo Mic connects directly to the XLR input of MIKI-D
- Use this to convert a 3.5 mm mini-jack to a 3 pin XLR, allowing you to connect a stereo Microphone with an unbalanced 3.5 mm jack output.
- Or create your own adapter, for instance a 5-pin Balanced Stereo XLR to 3-pin MIKI-D XLR input adapter.
Setup your MIKI-D for stereo recording
To make sure you can record stereo, you need to use MIKI-D Control to enable stereo recording on 1 or more of the 3 presets and make sure your recording device’s audio driver chooses the stereo USB input mode of the MIKI-D.
Step 1.
Set the “Stereo” checkbox to On in 1 or more of the 3 presets of the MIKI-D.
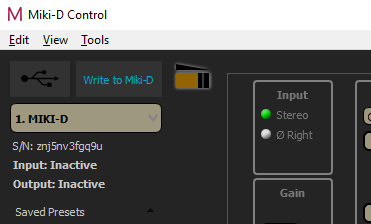
Step 2.
Make sure the recording device’s audio driver uses the stereo USB input mode.
Windows
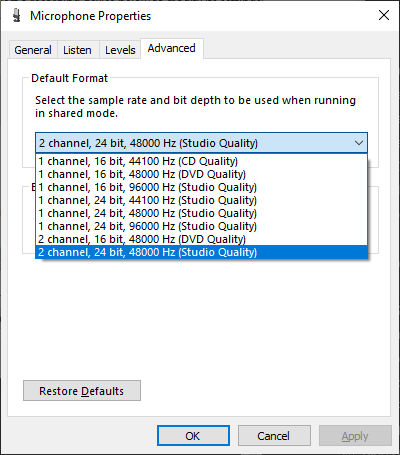
Choose a 2-channel mode , see more here. Please notice that stereo recording can only be used with a 48 kHz sample-rate.
macOS
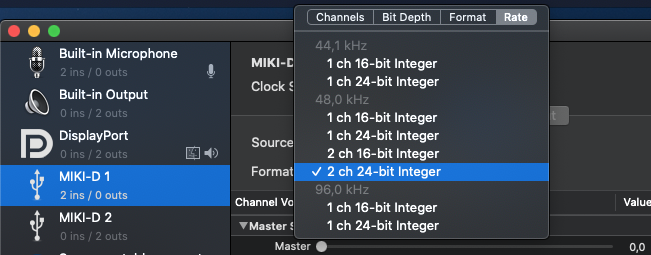
Choose a 2-channel mode , see more here. Please notice that stereo recording can only be used with a 48 kHz sample-rate.